Laying laminate flooring is probably the best first ‘big’ project a beginner can take on. Modern laminate needs no glue and no nails — the boards click together over a layer of underlay and float as one sheet — yet the finished floor looks like a professional fitted it, wears hard for years, and transforms a room in a single weekend. The skills are basic: measure honestly, cut cleanly, and respect one golden rule (the expansion gap) that this guide will make impossible to forget.
Follow the steps in order: preparing and acclimatising, laying underlay, getting the first row dead right, fitting the field of the floor, and finishing the edges so it looks fitted rather than installed.
Step 1: Prepare — Measure, Order and Acclimatise
Measure the room’s length and width and multiply for the area, then add 10% for cuts and mistakes — odd-shaped rooms and first attempts both eat boards. Buy your laminate, matching underlay, expansion spacers, and beading (unless you are removing the skirting — more below) in one trip. Then do the step beginners skip and regret: acclimatisation. Stack the unopened packs flat in the room where they will be laid for at least 48 hours. Laminate expands and contracts with temperature and humidity; boards laid straight from a cold delivery van into a warm house will move afterwards, and movement is what opens gaps and lifts joints.
Meanwhile, prepare the subfloor. It must be clean, dry and level — sweep and vacuum thoroughly (one piece of grit under a board telegraphs through as a click and a bump forever), and check levels with a long straight edge: laminate tolerates gentle undulation of a couple of millimetres over a metre, but sharp humps and dips cause flexing joints that squeak and eventually fail. Old carpet must come up (its underlay is too soft); sound vinyl or tiles can usually stay if flat and firm. On concrete floors, use underlay with a built-in damp-proof membrane.
Step 2: Lay the Underlay
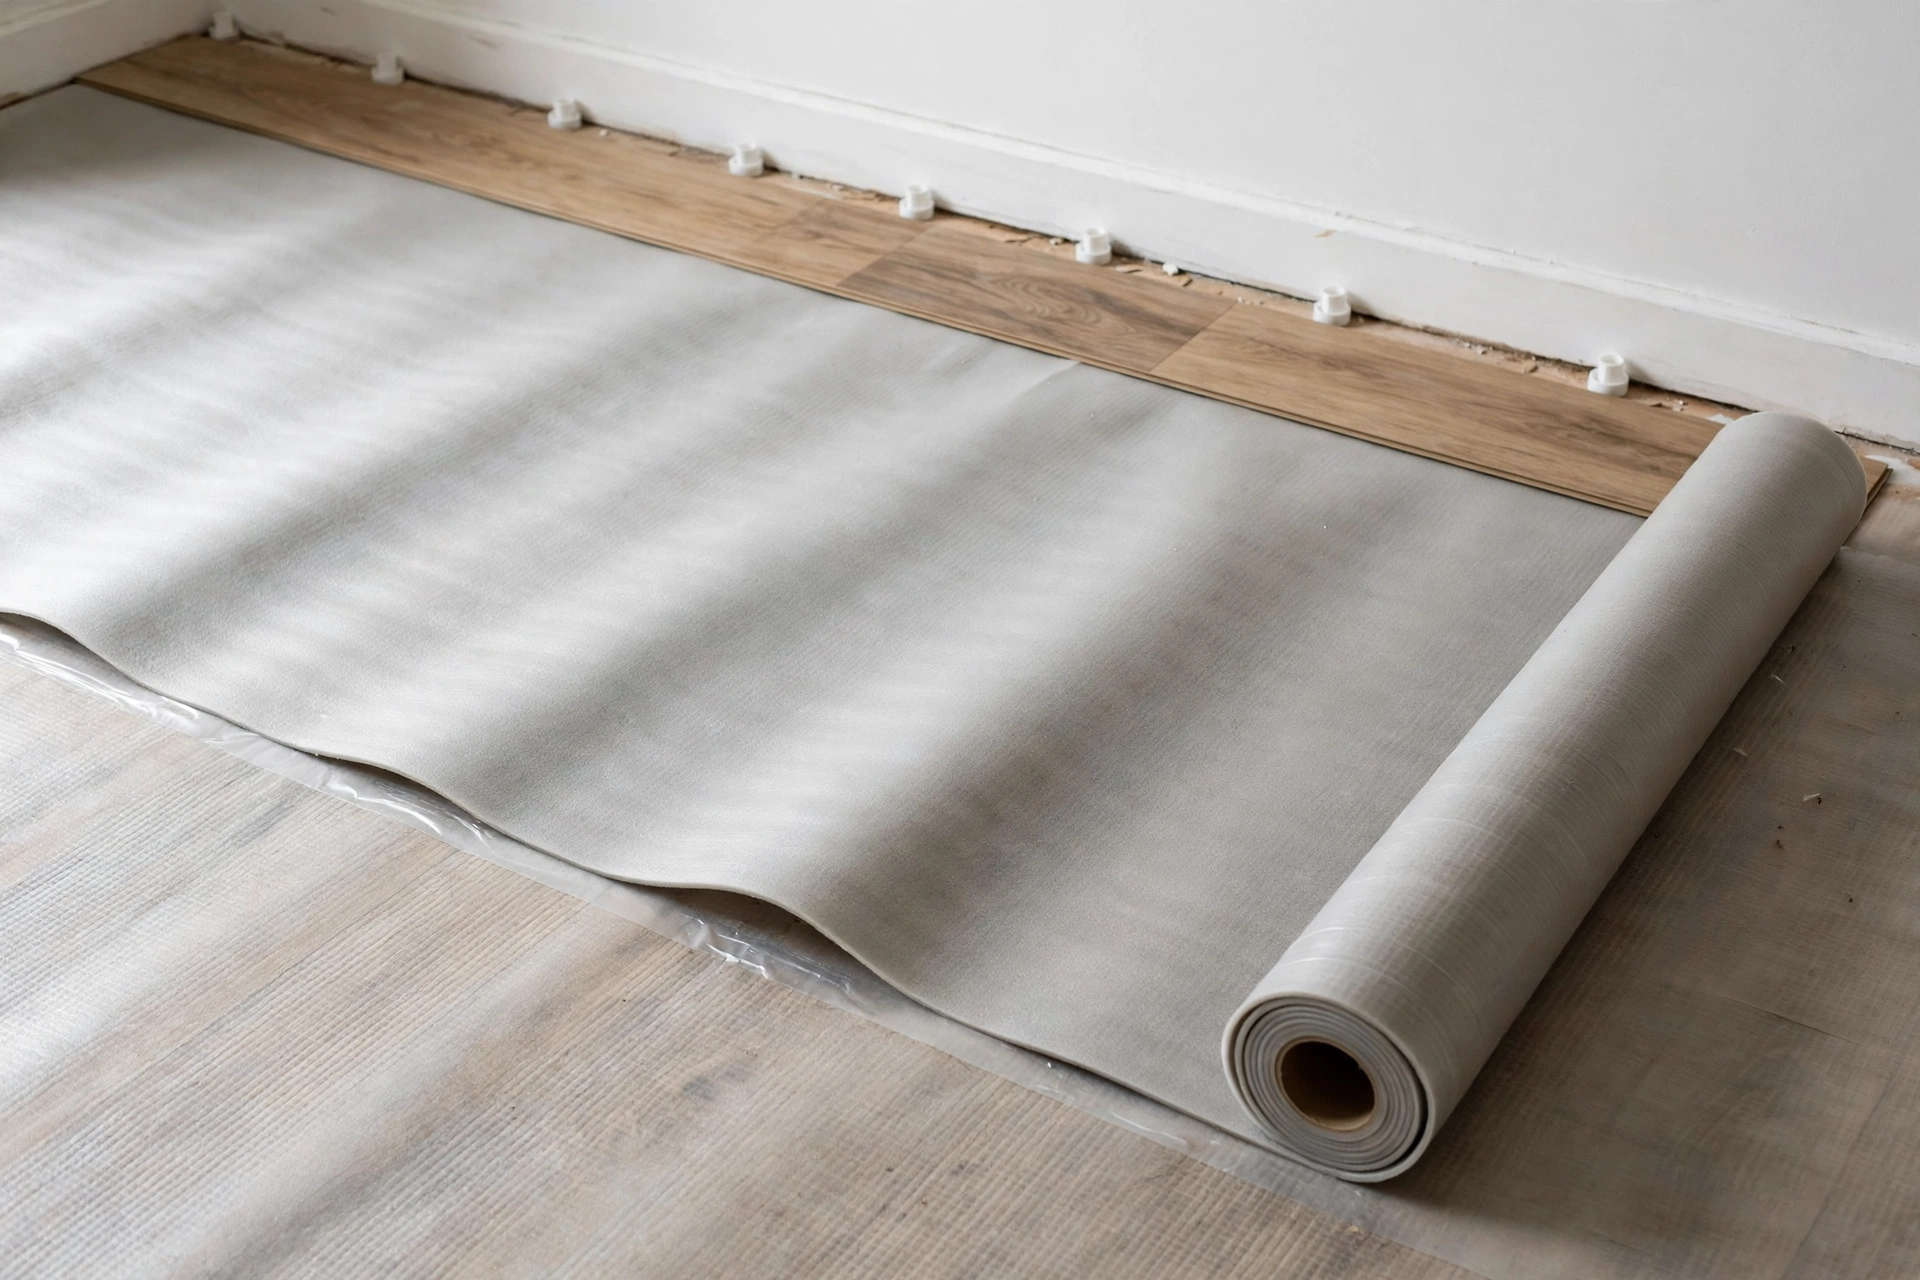
Roll out the underlay across the whole floor, trimming it with a utility knife at the walls, and tape the joins with the tape recommended for the product so it cannot creep or overlap as you work. Underlay does three jobs: it cushions the boards so the floor feels solid rather than hollow, it damps the clicking sound of footsteps, and (with the right type) it guards against residual moisture from below. It feels like a trivial layer; the finished floor’s feel underfoot is mostly decided right here.
Step 3: The First Row — Where the Job Is Won
Decide your direction first: boards usually run towards the main light source / along the longest wall, which hides the joints and lengthens the room visually. Place expansion spacers (typically 10–12mm, or as the manufacturer specifies) against the starting wall and lay the first row with the tongue side facing the wall, clicking each board end-to-end. This gap around every edge is non-negotiable: the floor is one floating sheet that swells in summer humidity, and without room to expand it will buckle and peak at the joints. Check the row is straight with a line or long level — if the wall bows, scribe and trim the first row to follow it, because every later row inherits this row’s shape.
Step 4: Fitting the Boards
Work row by row, clicking each new board into the long edge of the previous row at a shallow angle, then lowering and tapping it home with a tapping block and mallet (never strike the board edge directly — you will chip the click profile that holds the floor together). The rules that keep it looking professional:
- Stagger the joints — end joints in neighbouring rows must be offset by at least 30cm (roughly a third of a board). Use the offcut from the end of one row to start the next, provided it is long enough; the random, brick-like pattern is both stronger and better looking.
- Mix your packs — open several packs and draw boards from each in turn, so any slight shade variation between packs blends across the floor instead of forming a visible patch.
- Check as you go — after every couple of rows, sight along the joints and feel for lips with your palm. A joint that is not fully clicked now will be a creak and a gap later; fix it while the row is still reachable.
- Cut the last board of each row to length, remembering its expansion gap, and use a pull bar to click it into place where there is no room to swing a mallet.
Step 5: The Last Row and Tricky Bits
The final row usually needs ripping down in width on a saw — measure the gap at several points (walls wander), subtract the expansion gap, and leave the spacers in until the whole floor is down. Around door frames, undercut the architrave with a saw using an offcut of board plus underlay as a height guide, so the board slides underneath for a seamless finish instead of a fiddly notch. Pipes get a drilled hole slightly oversized for expansion, with the wedge behind glued back and the gap hidden by a pipe rosette.
Step 6: Finishing the Edges
Remove all the spacers — the gap must stay empty to work — then cover it. Two options: beading/scotia pinned to the existing skirting (fast, and the beginner’s friend), or skirting boards removed before laying and refitted over the gap (the neatest result, and worth it if the skirting was coming off anyway). Beading must be fixed to the skirting, never to the floor — pin the floor down and you have defeated the floating design. Fit threshold bars at doorways, give the floor a sweep and a barely-damp mop, and put felt pads under every furniture leg before the furniture goes back.
The Bottom Line
Lay laminate flooring like a pro by doing the invisible things right: acclimatise the boards, prepare a clean level subfloor, guard a 10mm expansion gap all round, stagger every joint, and finish the edges without pinning the floor down. None of it is difficult — and the room you get back on Sunday evening will not look like a beginner did it.
Frequently Asked Questions
Which direction should laminate flooring run?
Usually along the longest wall and towards the main window, so the joints catch less light and the room feels larger. In hallways, run boards along the length of the hall.
How long should laminate acclimatise?
At least 48 hours, stacked flat and unopened in the room where it will be laid. Skipping this is the most common cause of gaps opening or joints peaking in the weeks after fitting.
Can laminate go in a bathroom or kitchen?
Only laminate specifically rated as water-resistant, with sealed joints and edges — standard laminate swells at the joints when water sits on it. Many fitters prefer vinyl or tile in wet rooms; if you do use laminate in a kitchen, choose an aqua-rated product and wipe spills promptly.
Why does my laminate floor feel bouncy or creak?
Almost always the subfloor: a dip or hump underneath lets the boards flex, or debris was left under the underlay. Small areas can sometimes be calmed with specialist filler injected through a drilled hole, but the proper fix is lifting the floor and levelling the subfloor.